

Bamboomba: The sort of wooden robot.
What do you get when you cross a Roomba…

with scrap wood?
You get… Bamboomba!
You might be wondering why Kevin, being the professional researcher who he is, decided to build a half-wooden monstrosity with an obsolete robot base. Didn’t Kevin go to college for thirteen years or something? Why don’t you just buy a robot, Kevin? How is this robot going to help you pay your mortgage? Kevin.
Jeeeeeez, stop hassling me. I built Bamboomba to show what is possible with a couple of low-cost sensors and to learn about the new features in the Robot Operating System (ROS) 2 Navigation2 software stack. Also, I think it’s a really funny name.
To be completely honest, when my friend and I co-founded RIF Robotics in the fall of 2020, we submitted an application to Clearpath Robotics’ PartnerBot program and we won! That means we will be receiving an industrial-grade indoor ground robot in February 2021 named Dingo.
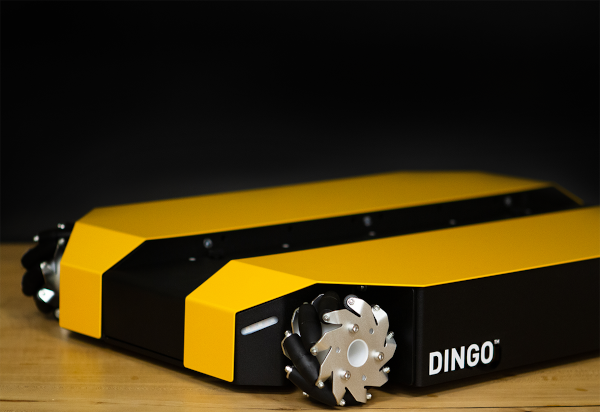
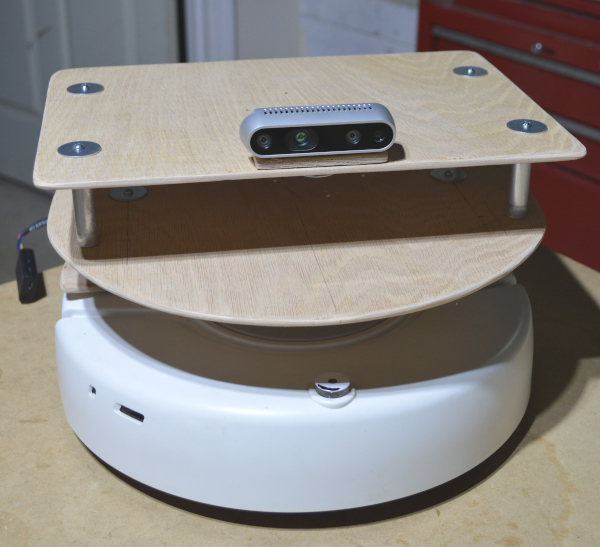
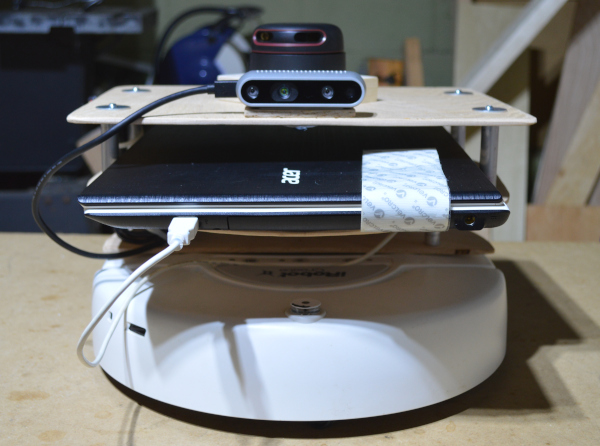
We will be using the ROS2 and Navigation2 software stacks to control Dingo and build maps of the environment with a LIDAR, but I wanted to get a head start on the software development, so I built Bamboomba as a surrogate platform. Both Bamboomba and Dingo will have the same sensor suite and software stack, so moving between the two platforms should be fairly seamless. I do know what I’m doing, right? The sensor suite consists of an Intel RealSense D435i and an RP LIDAR A2.
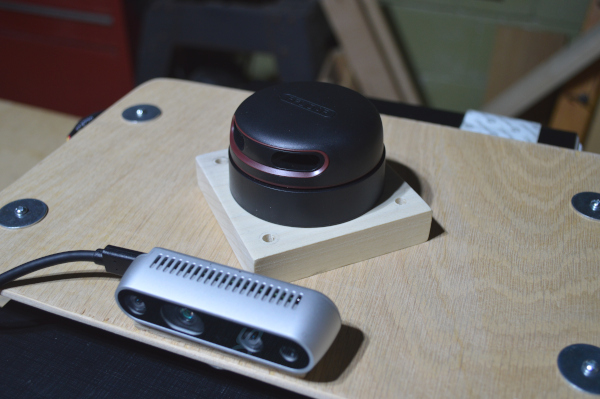
The D435i provides an inertial measurement unit (i.e., measurements of linear and rotational accelerations), a 2D RGB image, and a 3D point cloud of the environment. The RP LIDAR uses a rotating laser to measure distances to objects around the robot in 360°. There will be more on these sensors and how they help the robot to build maps and navigate around obstacles in a future post. The important part to note at this moment is that I hand cut and drilled the mounts for these professional sensors without using any CAD software or 3D printers. One of my industrial design friends said that he calls anything not cut by a CNC machine “folksy.” Like folk music. Not written down. I prefer the term, “Artisinal Robotics.”
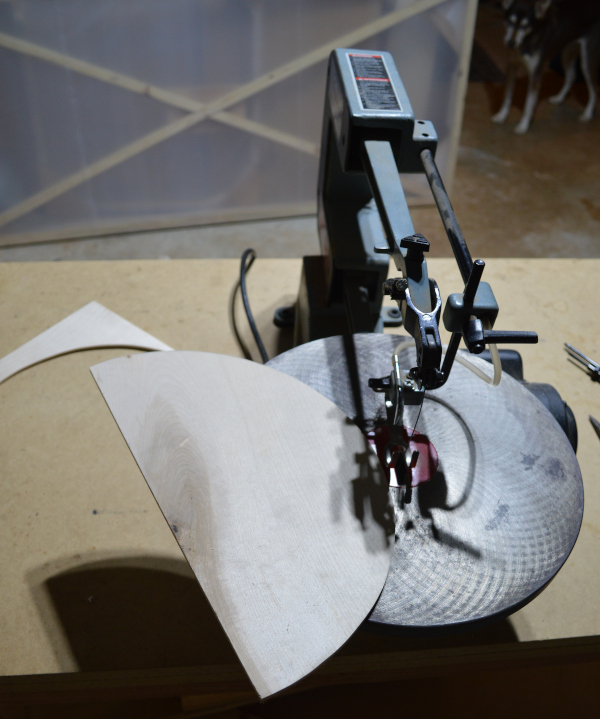
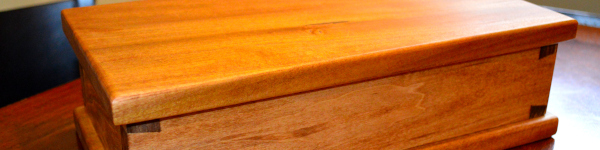
That GIF isn’t from a random woodworking project. I was fine-tuning the mounting block for the LIDAR on the shooting board that I made with a chisel and hand router.
Bamboomba is loosely based on the Turtlebot design, which has been used extensively in the open source and academic robotics communities.
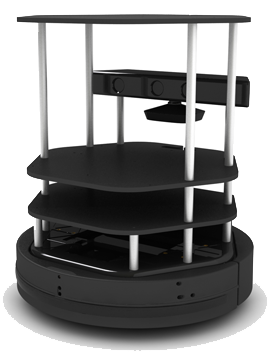
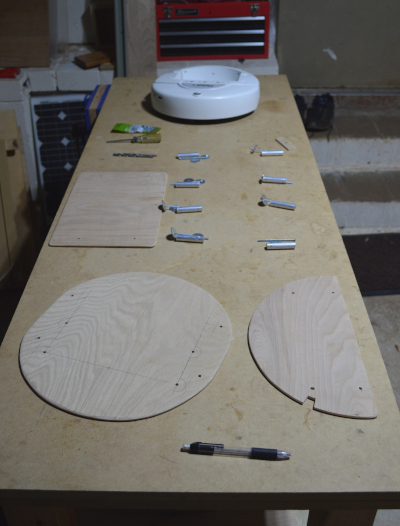
But Bamboomba is a lot cheaper, only took one day to build from scratch, and, literally, can’t be faithfully reproduced! The main idea I took from the Turtlebot was the multiple levels offset by aluminum stand-offs. This sparse design allows a roboticist to attach random sensors to the platforms and a closed laptop (the robot “brains”) can fit on one of the platforms. I was able to cut the platforms out of spare plywood using my scroll saw. I didn’t want to order aluminum stand-offs from an expensive mechanical parts store and, more importantly, wait two weeks for the parts to arrive, so I drove five minutes to Lowe’s and stared at the mechanical fasteners section for an hour until I came up with the following design for the stand-offs:
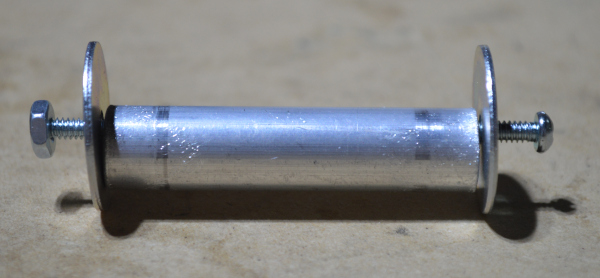
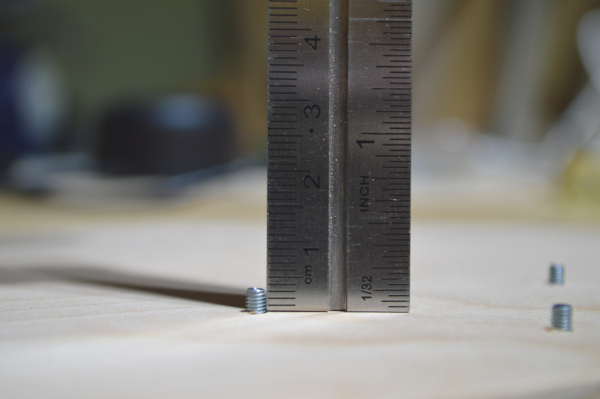
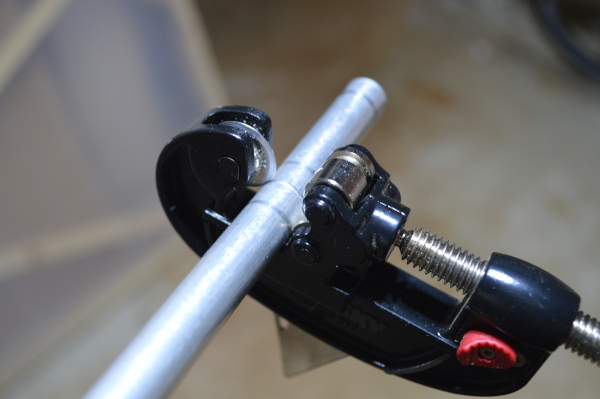
The aluminum rod cost $10 and I was able to cut it precisely with a pipe cutter:
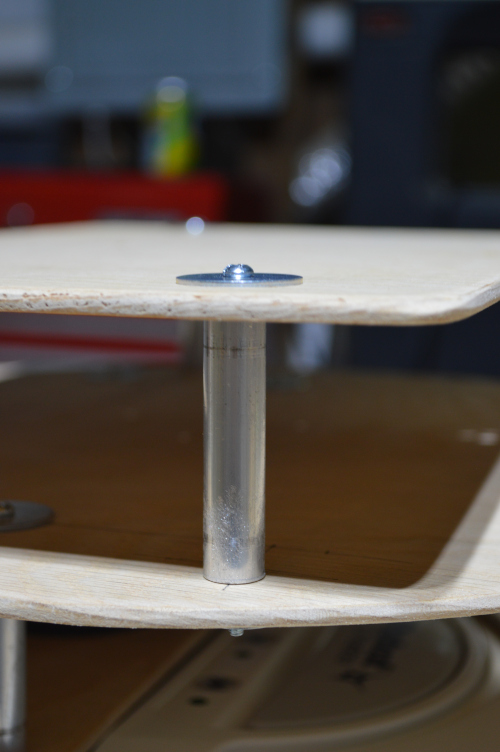
Once the aluminum rod stand-offs were cut to size, it was fairly easy to assemble the platforms. The most tedious part was determining where to drill the holes for the screws to pass through without a template. This involved drawing intersecting lines to find the midpoint between mounting screw locations and transferring hole points by laying the wooden platforms directly on top of each other. If you look closely, you can see my layout lines.
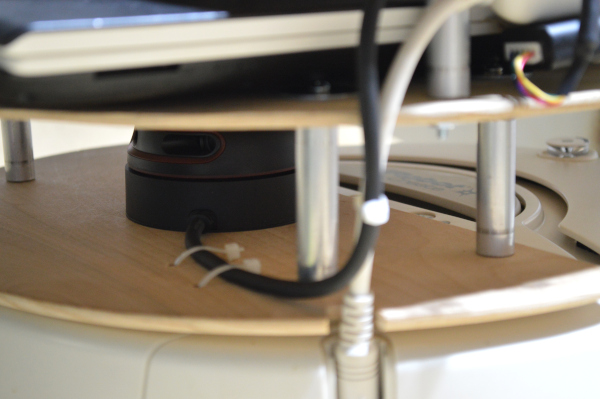
When designing a ground robot with a single planar LIDAR, one of the most difficult design decisions is where to place the LIDAR. If the LIDAR is mounted at a low-point on the robot, it will ensure that the LIDAR doesn’t miss any obstacles close to the ground. However, if the LIDAR is close to the ground, the laser will most likely be obstructed by other mechanical structures on the robot. This is opposed to mounting the LIDAR on top of the robot, where it can have an unobstructed 360° view of its surroundings. However, the LIDAR will not be able to see objects that are below its line-of-sight, which could result in collisions with low-lying obstacles! Of course, you could use multiple LIDARs to cover the blind spots, but that costs more money and Bamboomba is not that kind of robot. I drilled mounting holes for the LIDAR in both the bottom and the top platforms, so that I could experiment with mounting the LIDAR at two different heights. When the LIDAR is in the bottom configuration, I route the LIDAR and serial cables behind the aluminum stand-off to reduce the obstructions in the LIDAR’s field-of-view. The cables are beautifully secured in place with zip ties.
When the LIDAR is mounted in the top configuration, it has to be raised slightly to ensure that its laser is not obstructed by the RealSense camera. This is done with the 3/4” piece of wood that played the starring role in the previous animated GIF.
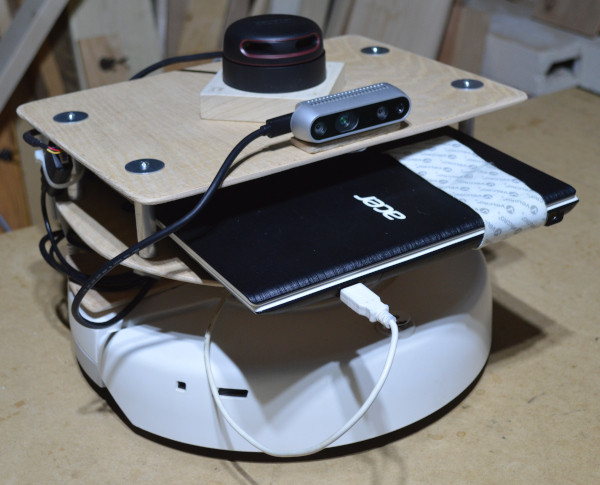
Finally, the laptop is mounted to Bamboomba with velcro to make it easy to remove.
I hope this article will inspire others to hack their own Roombas into wooden abominations. There are other ways to build or buy a similar robot, but I like mine best. Bamboomba’s platform is made from readily accessible parts that can be put together in a day with some basic cutting tools.
I’ve got to come clean about something that has really been bothering me. The robot’s base is not really a Roomba. It’s an iRobot Create. But the bamboo + Roomba name was soooo good and it’s basically the Roomba without the vacuum. My roommate from college gifted me the Create back in 2008 for being in his wedding when I had not even considered studying robotics in graduate school. He knew what I wanted.
In a future post, I will describe how the ROS2 and Navigation2 software stacks are used to build maps and navigate around obstacles in the environment with the LIDAR.
Thanks for following along.

Leave a comment